This document will introduce the steps to set up Agile List Options module in your Prestashop store. This module allows the store owner to provide paid listing options for sellers. This document is based on the Prestashop version 1.5.4.1.
Create a new category for the List Options
After install the Agile List Options module, a new category will need to be created by the Store Owner for the List Options. Four new products will be created by the Store Owner as well for the four List Options products, Basic Listion, Show on Home, Show on HOT and Show on Top. Each product is set up with a price. Seller must pay the applicable option fees set by Store Owner before the Seller's products can be viewed in the store. In order to configure the Agile List Options module, there are three steps need to be completed by the Store Admin log in to the Back Office.
1). Catalog > Categories > Add New
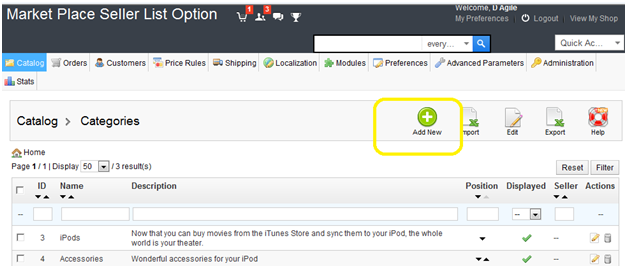
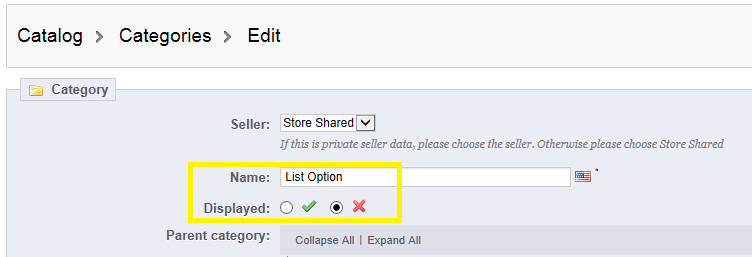
2). Name the Category newly created. And set the Displayed to NO, if you don't want the "List Option" category displayed under the CATEGORIES block at the Front Office. Click SAVE when complete.
Create the new products for each of the list options and associate them to the Category created at above.
1)Catalog > Products -> Add new
Name the new product, then click Save and Stay
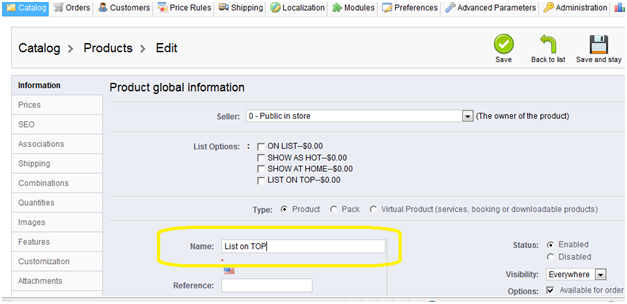
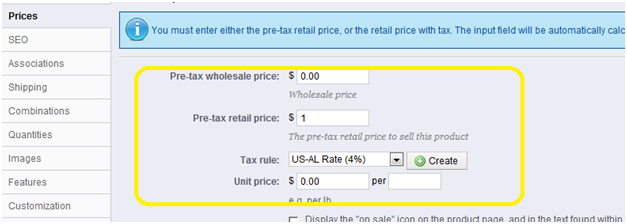
2).Set the price charged on the seller, then click Save and Stay
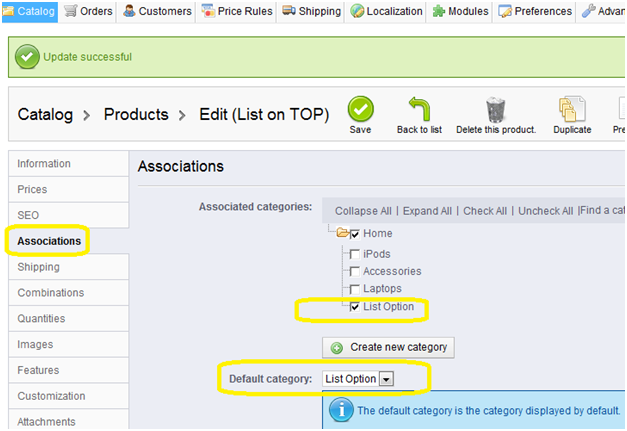
3). Associate the option product to the List Option Category created at the Step 1.
4). Repeat the step from 1 to 3 to create other options, Show as HOT, List at HOME and Basic Listing.

Configure the List Option module.
Modules > Modules > Agile Seller List Options module -> Configure
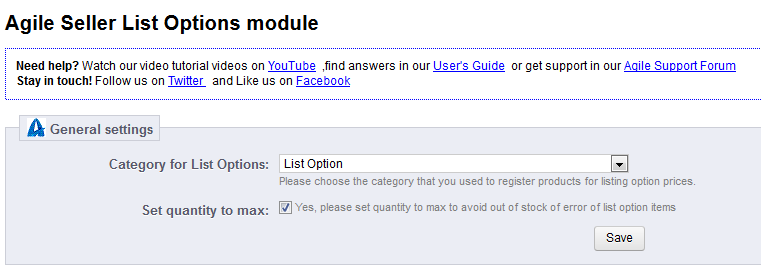
1). At the General settings, select the Category "List Option" created at 1 from the drop list, and save.
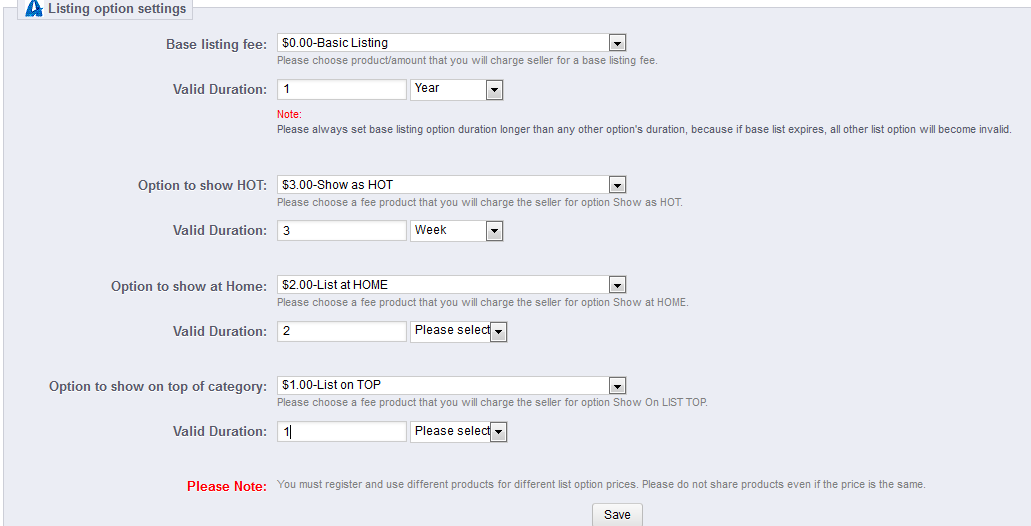
2). Configure the Listing options setting,
Select the option product created from the drop down list and set the duration for each list option.
